Introduction
NVR Viewer is a live video viewer for NVRs, DVRs, and IP cameras on Windows. It lets you view your cameras without installing the manufacturer's software, which often includes advertisements, requires a cloud account, or simply doesn't provide a good experience on modern versions of Windows.
It works with devices that support ONVIF Profile S, the standard profile for live video streaming. In practice, most brands on the market support it, including Hikvision, Dahua, Uniview, and many generic or white-label devices built on the same chipsets. An NVR or DVR reports its individual video feeds as channels; this guide refers to them as cameras throughout, whether they come from a single IP camera or a channel on a multi-channel device.
For Hikvision specifically: many Hikvision NVRs ship with ONVIF disabled by default. The app detects this automatically — if it cannot connect via ONVIF, it falls back to ISAPI (Hikvision's own HTTP API) to list the channels and construct the video URLs using standard RTSP. This fallback is specific to Hikvision; a device from another brand with ONVIF disabled simply won't connect.
Adding a Device
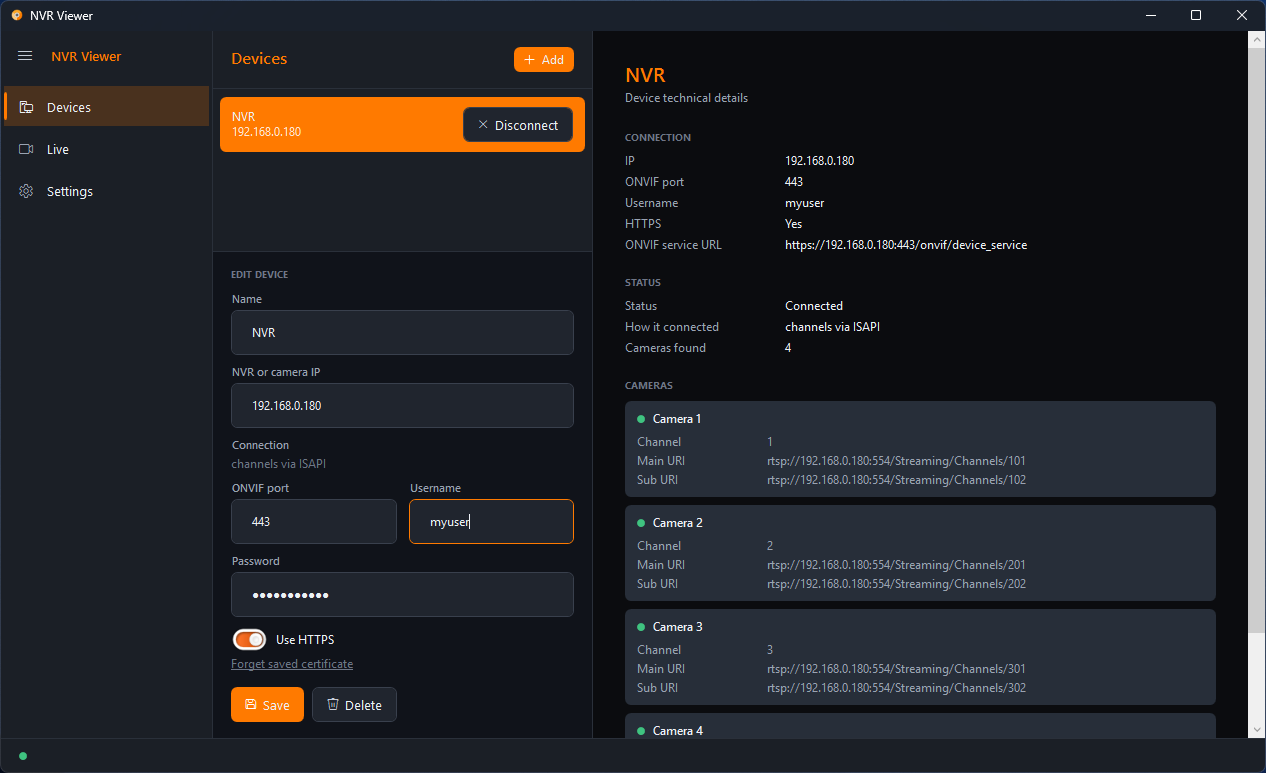
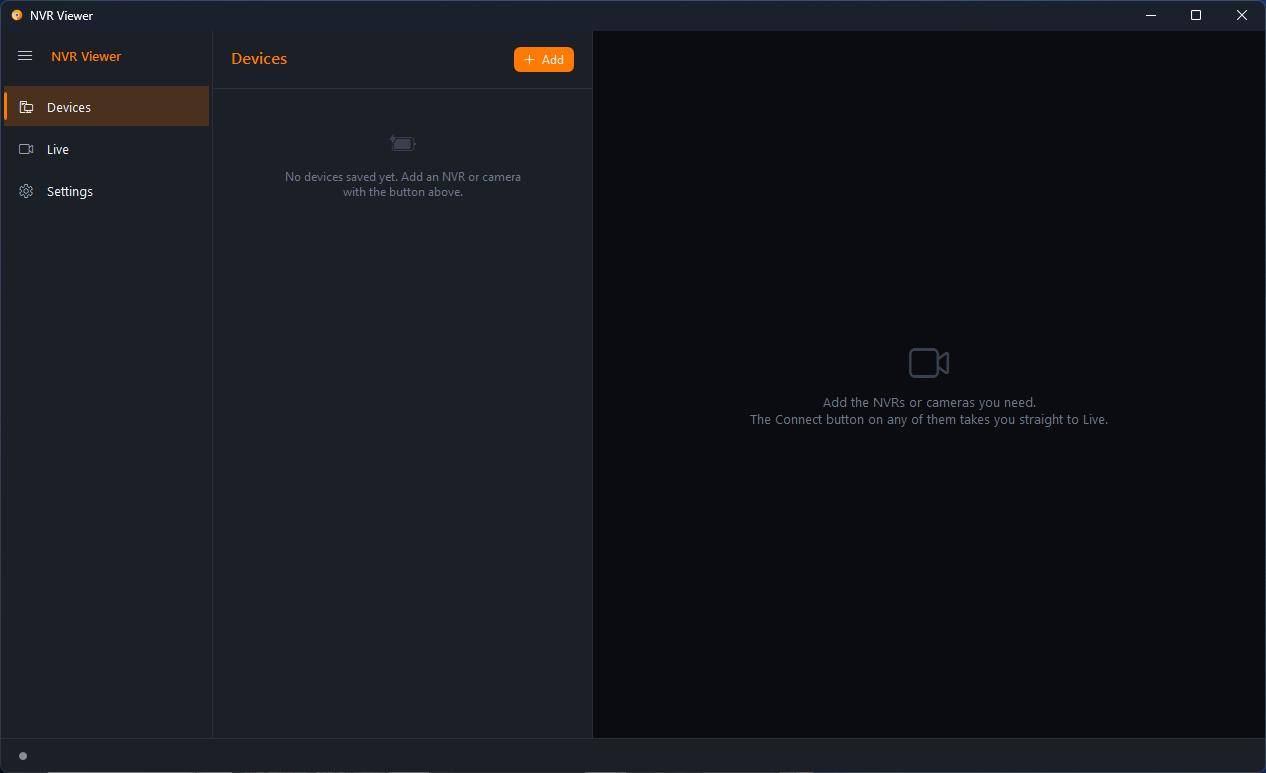
The app opens to the Devices tab. Click + Add and enter:
- Name — the name used to identify the device in the list (for example, "Home" or "Office").
- IP — the address of the NVR, DVR, or camera on your network.
- ONVIF port — 80 by default; some devices use 8000 or 8080. If you're not sure, try 80 first.
- User and Password — the device credentials. See the security recommendation below before using an administrator account.
- HTTPS — enable this only if HTTPS is enabled on that port. If you're unsure, leave it unchecked (HTTP) and try.
Click Save.
Connecting
In the device row, click Connect. The app will:
- Try ONVIF first to discover the device's cameras.
- If the device is Hikvision and has ONVIF disabled (common out of the box), automatically fall back to ISAPI — no additional configuration is required.
If neither method works, the app shows the reason (such as rejected credentials or a wrong port). See Troubleshooting below.
Viewing Cameras
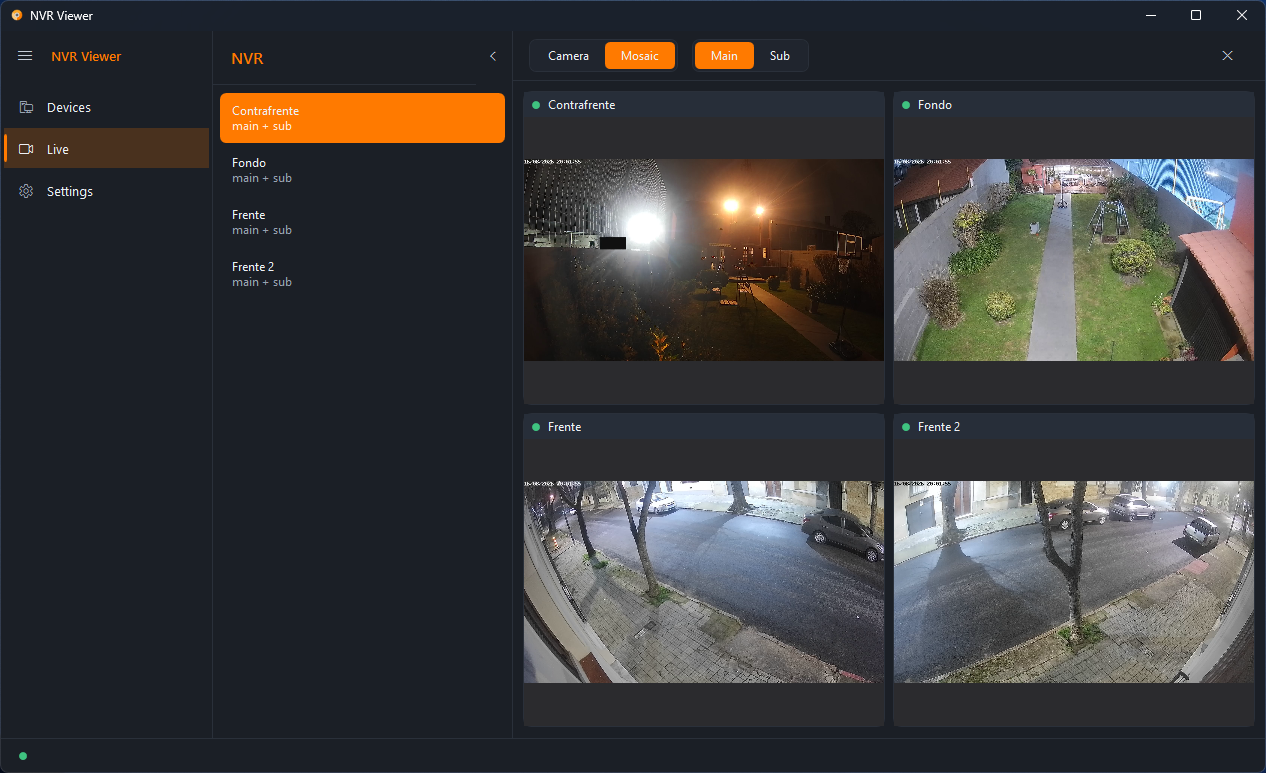
Once connected, the left panel lists the device's cameras. There are two ways to view them:
- Individual view — select a camera and it fills the entire video area.
- Mosaic — view all cameras at once in a grid. Drag and drop tiles to reorder them as you like; the order is saved.
- Clicking the video in individual view returns to the mosaic. Optionally, require a double-click to switch between individual view and mosaic (in Settings) instead of a single click.
- If a tile already has a live stream in the mosaic, opening that camera individually reuses the same connection instead of reconnecting — the switch happens instantly.
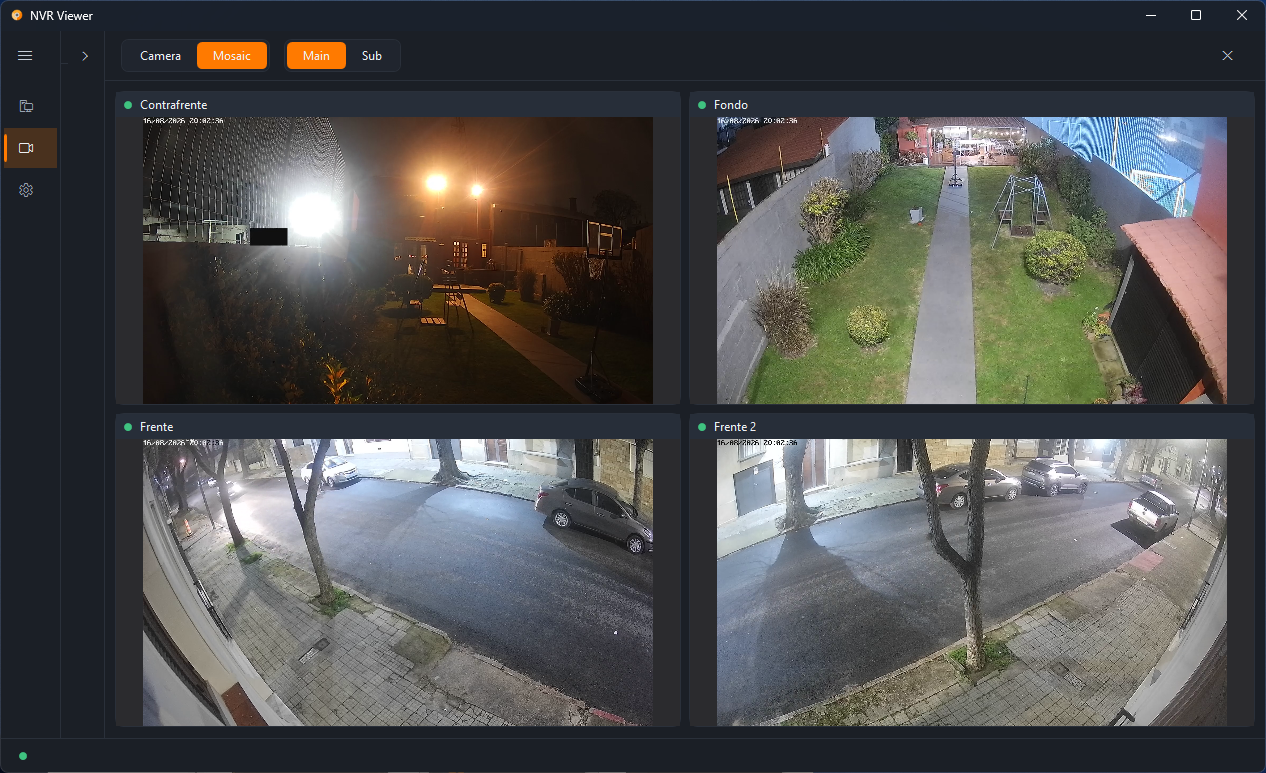
Mosaic columns — choose Auto, 2, 3, 4, or 5 fixed columns from the mosaic toolbar. This only fixes the number of columns, never the number of rows, so no camera is ever hidden by the chosen grid size; if there are more rows than fit on screen, the mosaic scrolls instead of shrinking the tiles.
Excluding a camera from the mosaic — right-click a camera in the side list and toggle it out of the mosaic grid. It stays fully available in individual view and in a floating window; the setting is saved per device and the camera's position in the order is preserved if you re-include it later.
Floating window — right-click a camera, either in the mosaic tile or the side list, and choose to open it in an always-on-top floating window. It has an independent connection to the camera, separate from the main window — handy for keeping an eye on a camera on a second monitor while using the app normally on the first.
Digital zoom — In individual view and floating windows, scroll the mouse wheel over the video to zoom in (up to 8×) around the point under the cursor, or scroll back to zoom out. While zoomed in, drag with the left mouse button to pan the image. Middle-click, or click the N× ✕ button shown while zoomed, to return to 1×. Zoom also resets when you change the camera, stream, or view. Snapshots always save the full frame, not just the zoomed area.
Renaming Cameras
The name reported for each camera by the device (via ONVIF or ISAPI) is sometimes not very descriptive ("Channel 1", for example). To give it your own name, right-click the camera name — either in the side list or in its tile header in the mosaic — and choose Rename. The chosen name is saved locally for the device and used throughout the app until you change it. To restore the device-reported name, right-click again and choose Reset to device name.
Video Controls
With a camera open in individual view, the top bar provides these controls:
| Control | What it does |
|---|---|
| Main / Sub | Switches between the high-quality stream (more bandwidth) and the lower-quality stream (lighter, useful with a mosaic of many cameras or on a slow network). |
| Full screen | Hides everything else. Press Esc to exit. Also available in Mosaic view. |
| Reconnect | Forces the stream to reopen if it appears stuck or frozen. |
| Snapshot | Saves the current frame as a JPEG image. By default, captures are saved to
Desktop\NVR Viewer - Captures; the folder can be changed in Settings.
|
| Always on top | The pin button keeps the main window above all other windows and turns orange when active.
The same option is also available in the window menu (right-click the title bar or press
Alt+Space), where it is indicated by a check mark. Both controls stay in sync,
and the setting is remembered the next time you open the app.
|
If a camera has no signal, its tile shows a clear message instead of an unexplained black screen.
Settings
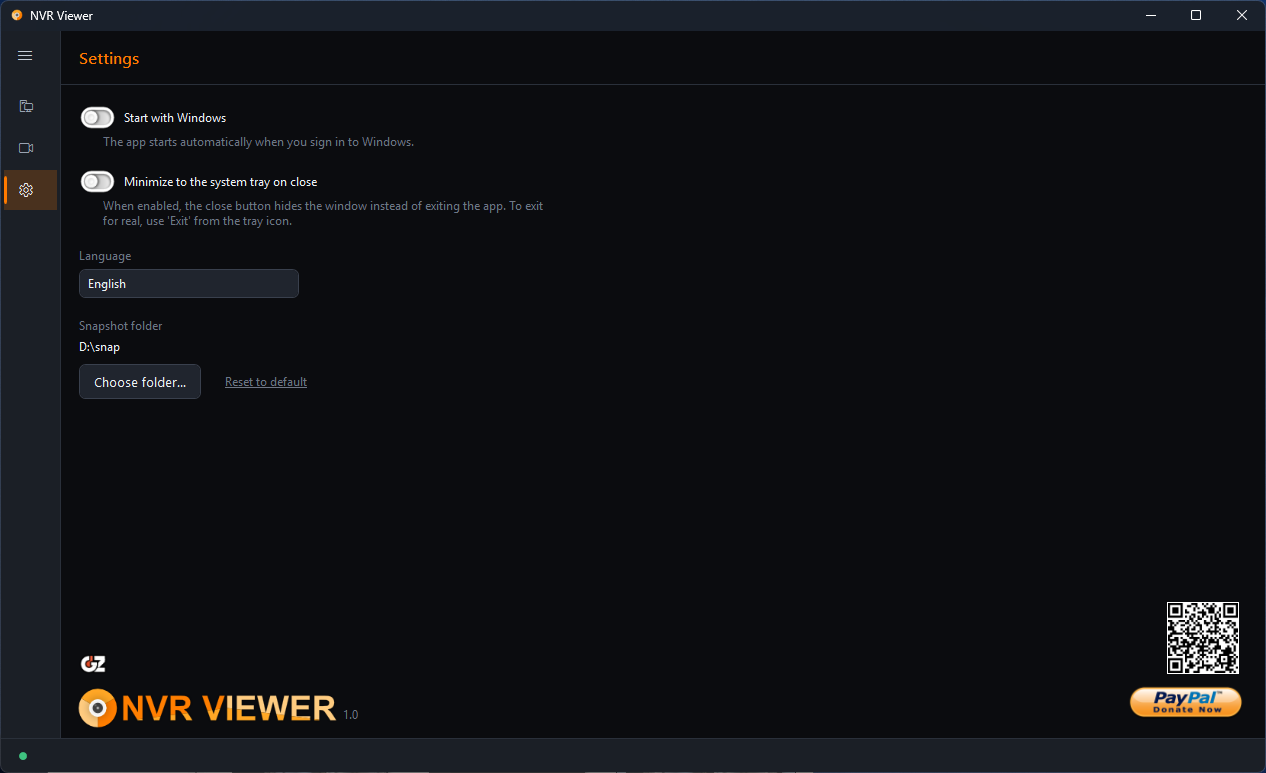
On the Settings tab:
- Start with Windows — launches the app automatically when you sign in to Windows.
- Minimize to tray — closing the window keeps the app running in the system tray instead of fully exiting (useful if you leave it running in the background).
- Opening a single camera switches it to the main stream — when enabled, opening a single camera while the mosaic is showing the secondary stream switches that camera to the main stream; returning to the mosaic restores the secondary stream.
- Bring-to-front hotkey — a global shortcut (
Ctrl+Alt+Kby default) that, from any program, restores the window if it was minimized or in the system tray, brings it to the front, and opens the Live tab. You can change or remove it in Settings; it must include Ctrl, Alt, or Win along with another key. If another application already uses the combination, NVR Viewer starts without the hotkey and shows a notice in Settings. - Language — 10 languages available: English, Spanish, French, German, Italian, Portuguese, Dutch, Russian, Chinese, and Korean.
- Capture folder — specifies where snapshot photos are saved. You can choose any folder or reset it to the default.
Security
This app only watches — it doesn't configure the device or delete recordings. For that reason, avoid using the NVR/camera's administrator account here. Instead, go to the device's web interface or local menu and create a new user with live-view-only permissions (an "operator" or "viewer" profile, depending on the manufacturer), with a different password from the administrator account, and use that account in the app. That way, if the password ever leaks, it can only be used to view live video — not to change the NVR's configuration or delete anything.
The app also limits the number of automatic reconnection attempts: if a stream never manages to authenticate, it backs off and eventually stops retrying instead of repeatedly sending failed login attempts to the device, which could otherwise lock the account.
If you use HTTPS: the device certificate
If you checked HTTPS when adding the device, the app saves the device's certificate the first time it connects. If a future connection presents a different certificate, the app rejects the connection instead of blindly accepting it. This can happen after a legitimate firmware change on your end, or if someone else on the network is impersonating the device.
If you changed the certificate intentionally (for example, after reinstalling firmware or generating a new certificate) and the app now blocks the connection, go to Devices, select the device, and click Forget certificate. The next connection will trust the certificate it receives and save it as the new certificate.
Troubleshooting
| What you see | Likely cause | What to do |
|---|---|---|
| Wrong user or password (401) | Wrong credentials, or the user doesn't have the ONVIF service enabled on the device | Double-check user/password; on Hikvision devices, try anyway — it falls back to ISAPI |
| The device responded but no camera shows up | ONVIF poorly implemented in the firmware, or the user lacks "live view" permission | Try another user/profile on the device, or check the ONVIF port (80, 8000, 8080) |
| Camera listed but "no video URI" | That specific channel has no signal or a broken profile on the device | Check that camera/channel directly from the device |
| Video doesn't start | RTSP port (554) blocked by a firewall, different RTSP credentials than ONVIF, or the device requires UDP instead of TCP | Check the error message (usually points to the cause); check the firewall |
| The error message stops changing and mentions giving up after several attempts | The stream never managed to connect at all in several attempts — most often wrong RTSP credentials, but can also be a wrong port/URL or a firewall blocking the connection entirely | The app stops retrying automatically after a few failed attempts to avoid triggering an account lockout on the device. Check the underlying error text (shown right before the giving-up message), fix the likely cause — starting with credentials — and reconnect manually (reselect the camera). |
| Image doesn't appear but there's no error | The stream isn't standard H.264/H.265 | Uncommon; may require changing the codec in the device's configuration |
| Not sure which ONVIF port to use | Varies by manufacturer/firmware | Try 80, then 8000, then 8080 |
If none of these suggestions solves the issue, the app's status/error text can be copied to the clipboard with one click and pasted when asking for help.
Supporting Development
If you find NVR Viewer useful and would like to support its continued development, you can donate via PayPal by scanning the QR code below.
Thank you for using NVR Viewer.