Overview
GDZ SoundMotion creates a visualizer on your desktop that reacts to whatever your PC plays: music, videos, games, or your own microphone. Choose one of 18 visualizations and 15 color palettes, then leave it floating in a corner or pin it to your desktop as an animated decoration.
The three parts of SoundMotion
The following terms are used throughout this guide:
| Name | What it is |
|---|---|
| Visualizer | The borderless window on your desktop. It has no title bar and no buttons: the whole window displays the visualization. |
| Tray icon | The icon next to the clock. It keeps the program running while the visualizer is hidden, and it is where update notices appear. |
| Options | The Options window, with two tabs: Visualization and General. |
Installation
Install SoundMotion normally using the installer. On first launch the visualizer appears in the center of the screen and the tray icon appears next to the clock.
Updates can be checked manually from Options → General → Check for updates. If enabled, Start with Windows launches SoundMotion automatically when you sign in.
Quick start
Everything most people need, all on one screen. The rest of the guide goes into detail.
Move it
Drag the visualizer from any point.
Resize it
Drag the three diagonal lines in the lower-right corner.
Change the visualization
← → or right-click → Visualization.
Change the color palette
↑ ↓ or right-click → Palette.
Open Options
Double-click the visualizer, or press O.
Choose the audio source
Right-click → Audio source. Choose your speakers or a microphone.
Pin it to the desktop
Right-click → Widget mode. To turn it off again, choose Exit widget mode in the tray menu.
Hide it
Esc or double-click the tray icon. It keeps running.
See the shortcuts
Press F1 at any time.
Getting started
Start playing some audio and the visualization comes to life.
If nothing is playing, the visualization stays still. That is intentional: SoundMotion pauses the visualization when there is no audio and resumes the instant sound returns.
Choosing the audio source
By default SoundMotion listens to the default Windows output — whatever your PC is playing. To visualize something else, such as a microphone or a line input, right-click the visualizer and open Audio source. Output and input devices use different icons, and the active device carries a check mark.
The list refreshes every time you open the menu, so headphones you just plugged in show up without restarting anything. The same list is available in Options → General, where a button lets you refresh it manually.
Everyday controls
The visualizer
The window has no title bar or frame, so you interact with it directly:
| Action | How to do it |
|---|---|
| Move it | Drag from any point with the left button. A thin frame shows its exact boundaries while you move it. |
| Resize it | Move the mouse over the window: three diagonal lines appear in the lower-right corner. Drag them. |
| Open Options | Double-click. It opens on the Visualization tab. |
| Open the menu | Right-click. |
| Hide it | Press Esc, double-click the tray icon, or use Show / Hide in the tray menu. The program keeps running and uses very little CPU and memory while hidden. |
Position and size are remembered: next time you open the program, the visualizer is exactly where you left it. Closing it only hides it — to close the program use Exit.
The tray icon
Right-click it for a short menu: Show / Hide, Options… and Exit, plus Exit widget mode while Widget mode is active. This is also where update notices appear; clicking the notification opens the download page.
If you cannot see the icon: Windows hides tray icons it considers rarely used. Click the small ^ arrow next to the clock, and drag the icon onto the taskbar to keep it visible, or enable it in Windows Settings → Personalization → Taskbar.
The right-click menu
The quick control menu: the most-used settings without opening any window.
| Menu item | What it does |
|---|---|
| Audio source | Chooses which device SoundMotion listens to. |
| Visualization | Chooses one of the 18 visualizations. The active one is checked. |
| Palette | Chooses one of the 15 color palettes. |
| Sensitivity → More (+) / Less (–) | Steps the reaction to volume up or down. Use it when quiet music barely moves the visualization, or when everything is maxed out. |
| Always on top | Keeps the visualizer above other windows. Enabled by default. |
| Widget mode | Pins the visualizer to the desktop, behind other windows. See section 9. |
| Presets | Save the full state of the active visualization under a name and reapply it later. See below. |
| User guide | Opens this guide in your browser. |
| Options… / Exit | Opens the full Options window, or closes SoundMotion. |
Rule of thumb: the right-click menu for quick changes, Options for fine-tuning — exact sensitivity, opacity, or the settings of an individual visualization.
Presets
Presets save the complete state of the active visualization, including all of its settings, sensitivity, and opacity, under a name you choose. Open Presets in the right-click menu to save the current state; saving under a name that is already in use replaces that preset. Once saved, the preset's name appears directly in the Presets submenu—select it to apply it. Deleting a preset is done from the Presets window.
Keyboard shortcuts
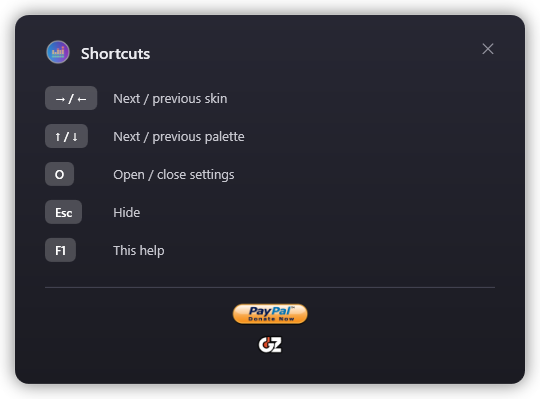
Shortcuts work when the visualizer has focus. If you have been typing elsewhere, click it once and they respond again. Press F1 for the same list inside the app:
| Key | What it does |
|---|---|
| ← → | Next or previous visualization. It loops around, so you can cycle through all 18 without releasing the key. |
| ↑ ↓ | Next or previous color palette. |
| O | Opens Options, or closes it if already open. |
| I | Shows the Now Playing info for a few seconds. Works even when Now Playing is turned off in Options. |
| Esc | Shows or hides the visualizer. |
| F1 | Shows this shortcut summary. Closes with F1, Esc, O, or its own button. |
| Ctrl + scroll wheel | Zooms in or out on the active visualization. |
| Ctrl + drag | Repositions the active visualization. |
| Ctrl + double-click | Resets the position and zoom of the active visualization to their default values. |
| Ctrl+Alt+J | Global shortcut that brings the window to the front and makes it editable, even in Widget mode. |
The arrows are the fastest way to explore: cycle visualizations with ← → and, when you find one you like, try palettes with ↑ ↓. If Options is open at the same time, its drop-downs follow along.
Options
Open it by double-clicking the visualizer, pressing O, or choosing Options… from the right-click or tray menu. Double-clicking opens it on the Visualization tab, since that is usually the first setting users want to adjust; every other way opens it on General.
The window automatically opens next to the visualizer so it does not cover it, and you can move it by dragging any empty area. Close it with Close, the ✕ button, or Esc.
Visualization tab
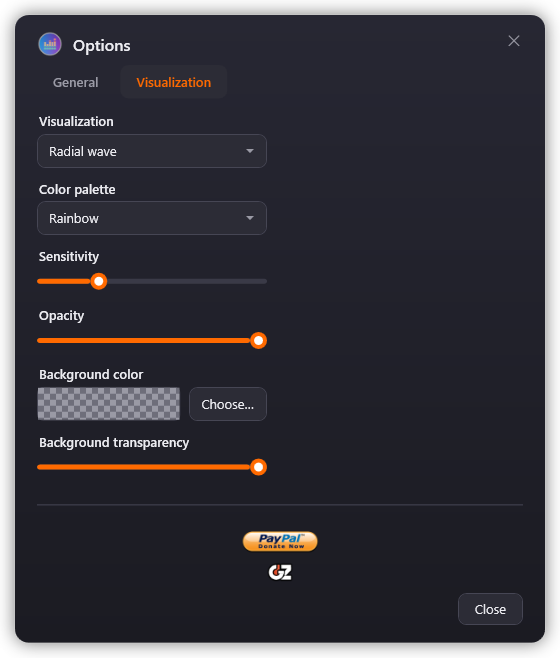
| Setting | What it does |
|---|---|
| Visualization | Chooses the active visualization, out of 18. See section 7. |
| Color palette | Chooses the colors used, out of 15. See section 8. |
| Sensitivity | How strongly the visualization reacts to the sound level. Raise it for quiet music; lower it if it maxes out too easily or spills out of the window. |
| Opacity | Transparency of the whole visualizer. Lower values blend it into the desktop. |
| Visualization options | Additional controls for the selected visualization — bars, rings, sides, arms, thicknesses, camera, text settings. Every visualization has some, so the panel is never empty; its contents change as you switch. |
| Restore this visualization | Puts the visualization you are looking at back to factory settings and leaves everything else alone. See below. |
Each visualization remembers its own settings. Sensitivity and opacity are stored separately for each one. You can keep a sensitive, transparent Oscilloscope and a calm, opaque Bars, and each returns to its own values when you switch back.
Restoring a single visualization
Once you have been playing with the settings of one visualization, you may want that one back the way it came without losing the work you did on the other 17. The Visualization tab does exactly that: it discards the saved settings of the active visualization and restores its default settings, since each one keeps its options in its own fields.
Nothing else is touched — the other visualizations, the palette, the language, the window and the General tab all stay as they were. If what you want is to reset the whole appearance instead, use Restore defaults on the General tab.
General tab
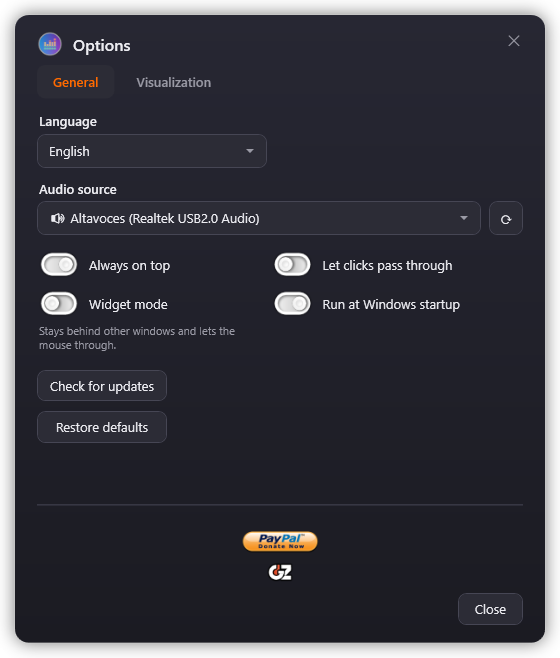
| Setting | What it does |
|---|---|
| Language | Available in ten languages: English, Spanish, French, German, Italian, Portuguese, Dutch, Russian, Korean and Chinese. Applied instantly, no restart needed. |
| Audio source | The audio device SoundMotion listens to. The button beside the list rescans your hardware. |
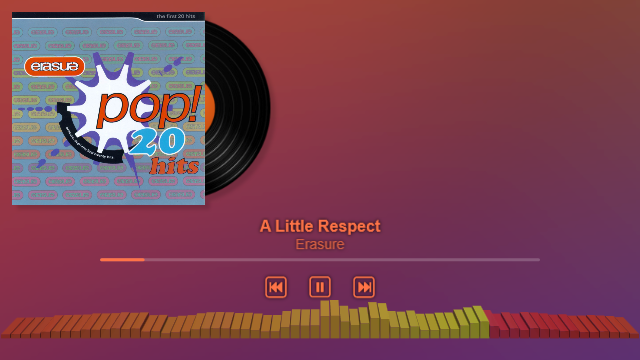
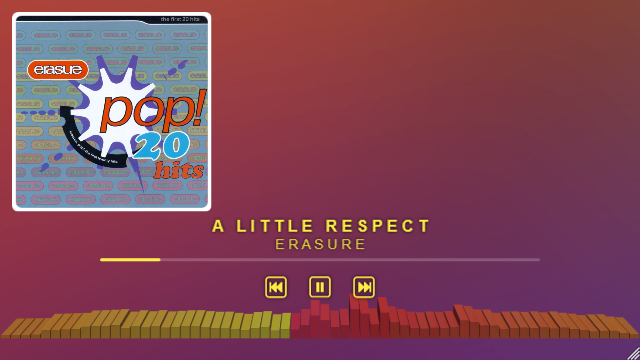
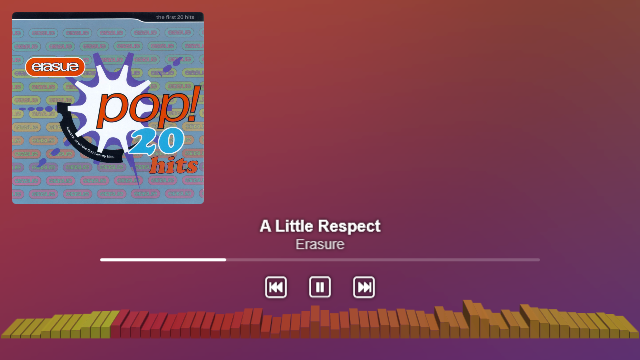
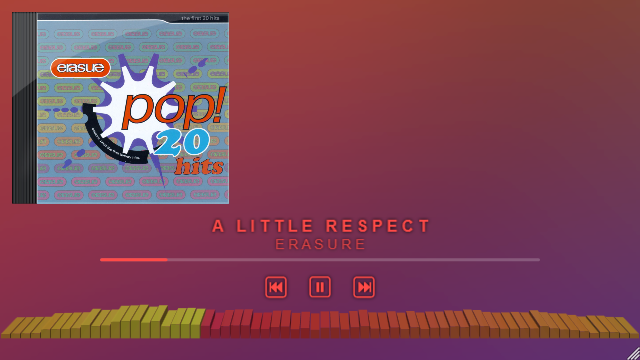
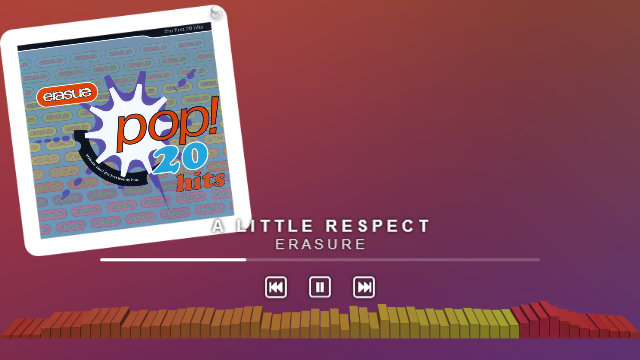
| Now Playing | Shows the Now Playing overlay with the title, artist, cover art, progress bar, and playback controls. Choose from five cover art styles, including Frame, and combine text styles for the title. |
| Always on top | Keeps the visualizer above other windows while you work. |
| Click-through | Lets mouse clicks pass through to whatever is underneath. While it is on you cannot drag the visualizer or open its menu — turn it off again from the tray icon. |
| Widget mode | Pins the visualizer to the desktop. See section 9. |
| Start with Windows | Launches SoundMotion when you log in. |
| Check for updates | Looks for a newer version and shows a download link if there is one. |
| Restore defaults | Returns the appearance to factory settings: visualization, palette, sensitivity, opacity and every visualization option. It asks for confirmation, and it leaves the language, window position and audio device untouched. To reset just one visualization, use the button on the Visualization tab instead. |
How does Now Playing work?
Most music players tell Windows what they're playing — the same information you see in the volume flyout. SoundMotion simply reads it.
- Works with Spotify, YouTube and other sites in your browser, Media Player, and most other players.
- Cover art comes directly from the player itself. If a player doesn't provide one (Spotify sometimes skips it when you change songs quickly), no cover is shown.
- Some players don't share this information with Windows (for example, AIMP without a plugin). With those players, Now Playing won't appear.
- Private by design: nothing is looked up online, and your music information never leaves your PC.
Now Playing panel
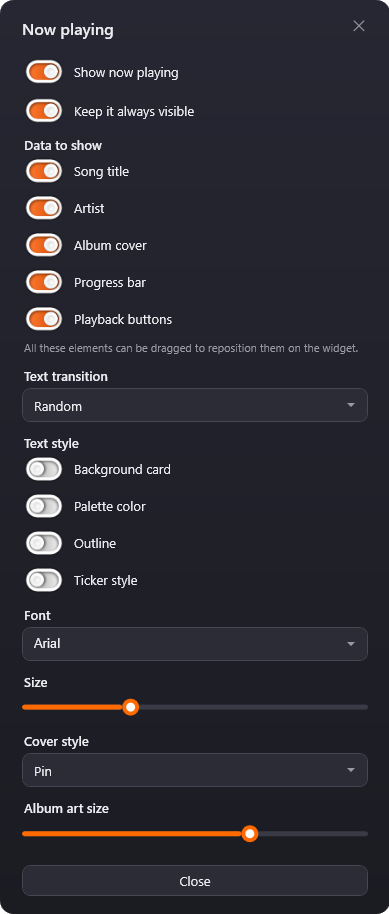
Now Playing cover art
Five cover art styles are available for the Now Playing overlay: Pin, Vinyl, Cover, Compact Disc, and Frame.
The visualizations
18 ways of showing the same audio. Switch with ← →, from the right-click menu, or from the Visualization tab.
Every visualization remembers its own settings independently. Whatever you adjust in one — sensitivity, opacity, its own controls — is stored only for that one, and comes back exactly as you left it the next time you select it.
All 18 are customizable. Visualizations that used to have no settings of their own gained the basics in this version — spacing, thicknesses, peak and cell shape, fall speed — and the ones that already had settings gained more. Each one's controls appear automatically in the Visualization options panel, and are listed under its description below.
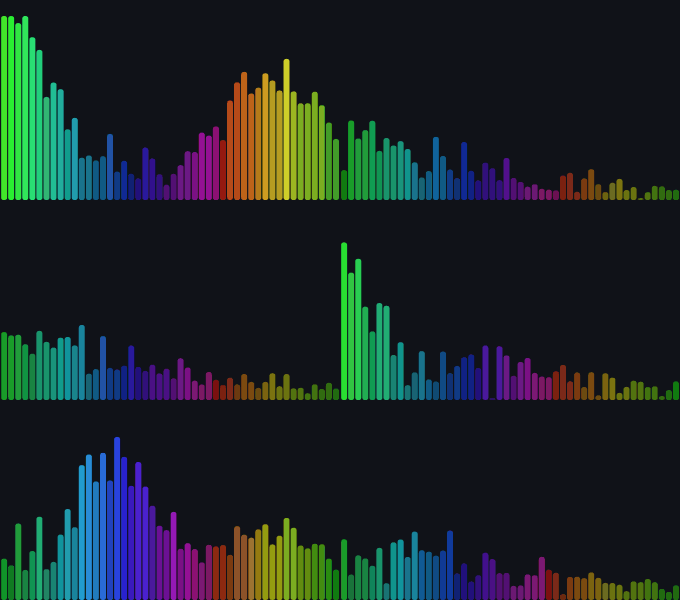
Bars
A classic equalizer: bass on the left, treble on the right. Bars (8–96) · Bar spacing (0–45) · LED segments (0–32) · Smoothing (0–100) · Vertical gradient · Rounded corners
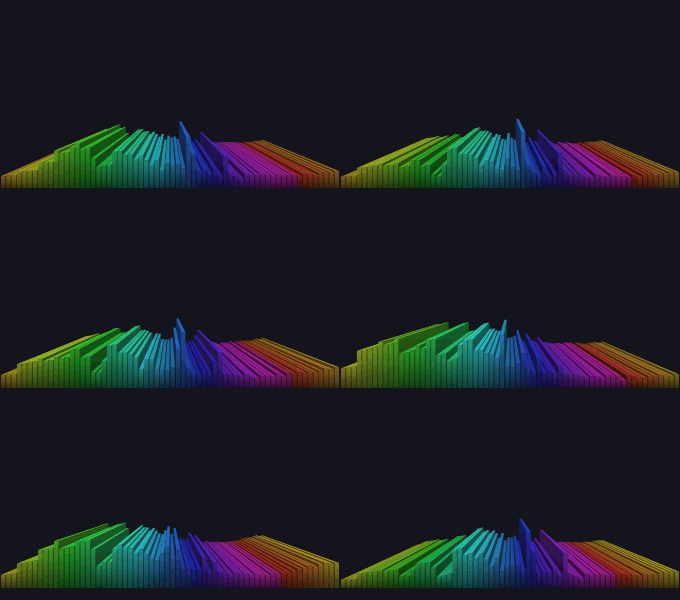
3D bars
The same equalizer, extruded into depth: besides the front face, you see the top face and one side face, and every depth edge aims at the same vanishing point, so the row reads like a scale model. The default visualization for new installations. Bars (8–64) · Bar spacing (0–45) · Depth (5–45) · Camera angle (−100–100) · Camera height (0–100) · Floor grid (0–24) · Vertical gradient
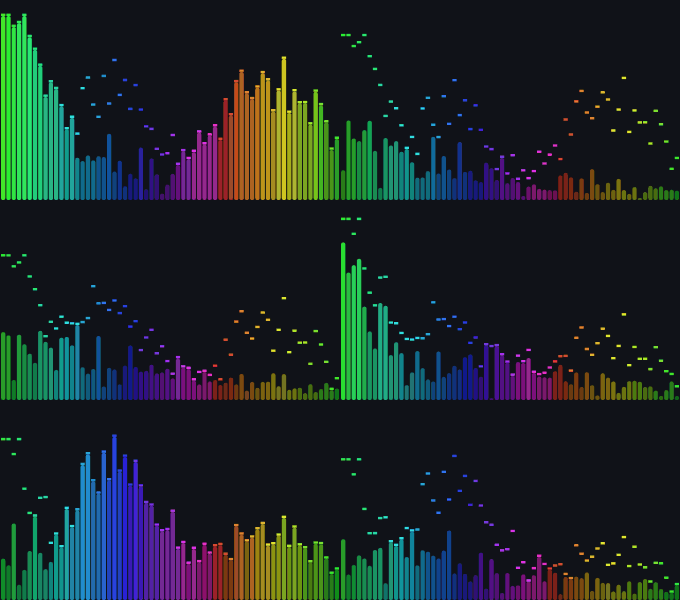
Bars + peak
Like Bars, but each one leaves a peak marker at its maximum that falls back slowly. Makes peaks easier to see. Bars (8–96) · Bar spacing (0–45) · Peak separation (0–100) · Fall speed (25–300) · Peak shape · Rounded corners
Mirror bars
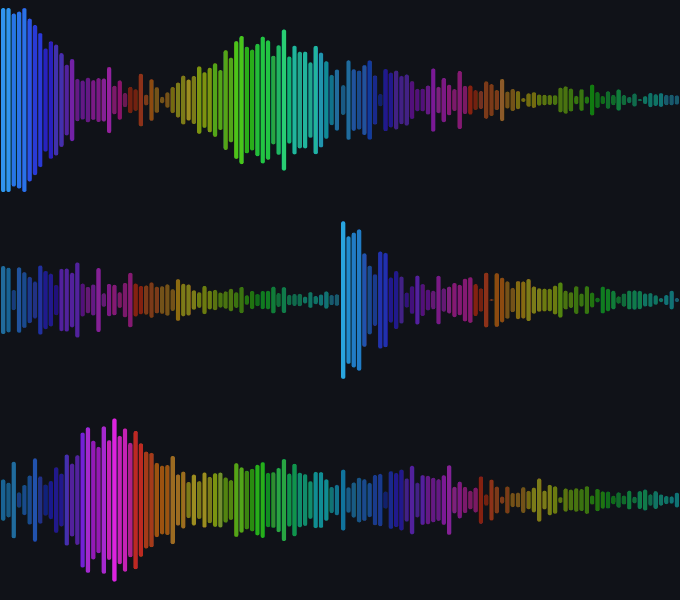
Bars growing from the center upwards and downwards. Works especially well in wide, short windows. Bars (8–96) · Bar spacing (0–45) · Reflection (0–100) · Center gap (0–100) · Rounded corners
LED matrix
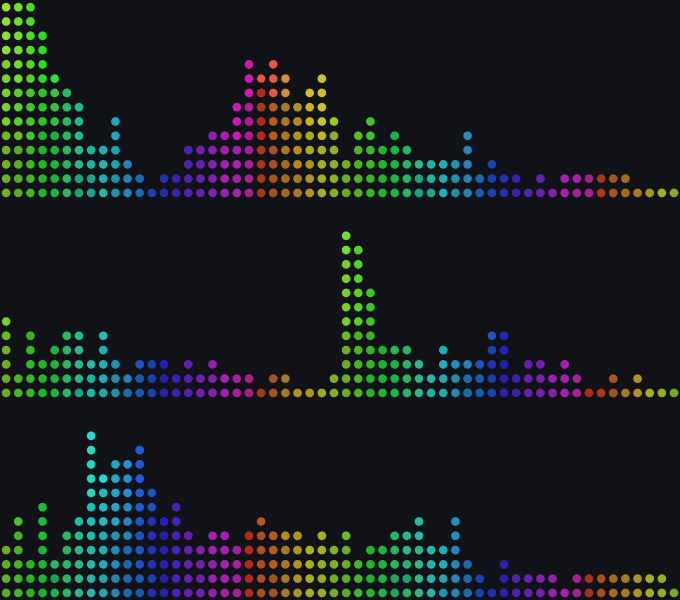
Dots that light up like the VU meters of an old hi-fi. Peak hold does double duty: at 0 there is no peak marker, and the higher you set it, the slower the marker falls. Columns (8–48) · Rows (4–32) · LED spacing (0–70) · Peak hold (0–100) · Square LEDs
Grid
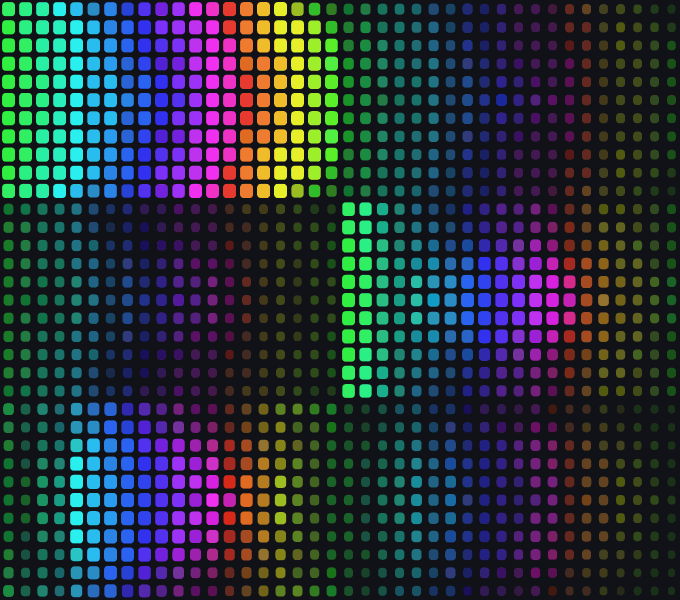
A field of cells that follows the spectrum and throws waves out from the center on every bass hit. Density (6–40) · Cell shape

Radial
Spikes shooting out in every direction from a core that pulses with the volume. Line thickness (25–300) · Rounded ends · Show core · Core color

Blob
An organic shape that flows with the music. Smooth and symmetrical. Border thickness (0–300)
Flower
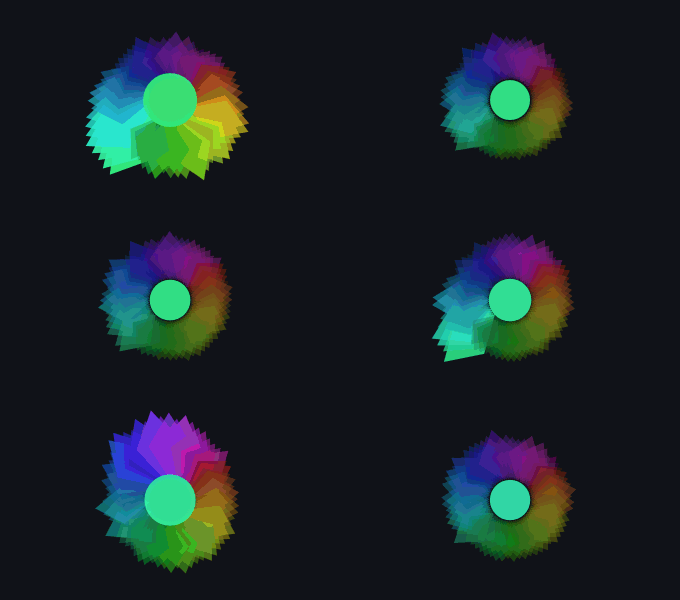
Petals that open and close with each frequency while it slowly rotates. Here Rounded corners curves the sides of the petals. Size (0.5–1.6) · Rounded corners · Show core

Rings
Concentric circles that widen and thicken, each one tuned to a range of frequencies. Rings (3–20) · Intensity (0.5–3) · Ring style · Glow (0–100) · Smoothing (0–100) · Fit the window
Tunnel
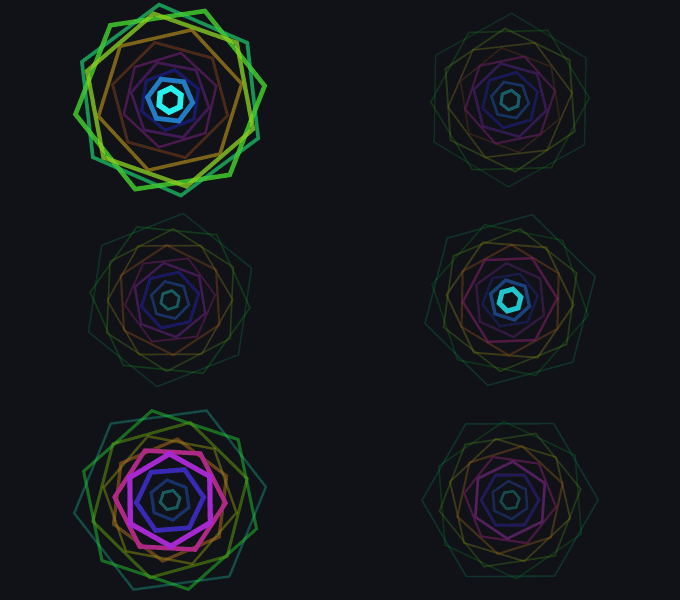
Polygons that rotate and recede, creating a sense of depth. With 3 sides they become triangles; with 8, they approach a circular shape. Rings (4–18) · Intensity (0.5–3) · Sides

Spiral
Dots spread along a spiral that pulse with the sound. At Spin 0 it stays still and only throbs; negative values make it rotate in the opposite direction. Arms (1–6) · Turns (1–6) · Spin (−3–3) · Breathing (0–100)

Kaleidoscope
The spectrum mirrored around the center, like looking through a real kaleidoscope. Size (0.5–1.6) · Segments · Spin (−3–3) · Idle length (0–100)
Oscilloscope
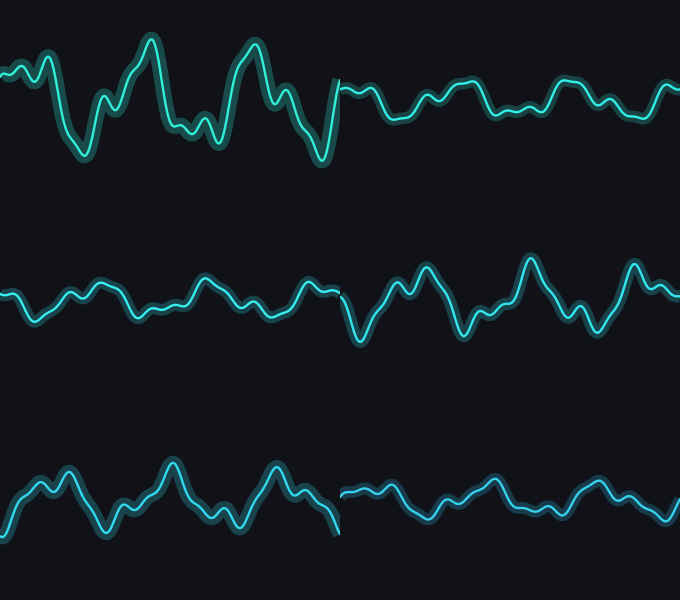
The raw sound wave crossing the window. The best one for seeing the shape of each instrument. Line thickness (25–300) · Border thickness (0–300)

Radial wave
The same wave, wrapped into a circle. Line thickness (25–300) · Border thickness (0–300)
Spectrogram
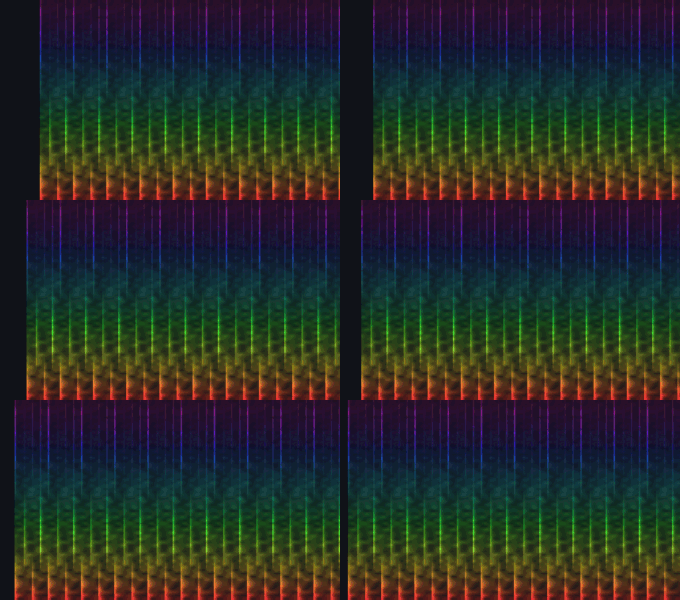
Time scrolls to the left and each column stores a snapshot of the sound at that moment, bass at the bottom, treble at the top. Ideal for seeing the structure of a song. Time window (2–30 s) · Color by · Smoothing (0–100)

Beat image
Make your own image pulse to the bass using an album cover, a logo, or a photo. Choose image… opens a file picker, and Default restores the GDZSoft icon. Size (20–100) · Intensity (0–2) · Beat sensitivity (0–100) · Fall time (0–100) · Image

Text
Animated text that dances. Type whatever you like — a name, your radio station, a greeting — and choose the font. Word · Reaction · Font · Intensity (0–2)
3D bars, in detail
3D bars is the new visualization introduced in this version, and the one you get on a fresh install. It is the classic equalizer extended into depth: each bar is a solid block, showing its front face, top and one side, and all the depth edges converge on a single vanishing point. Move that point and the whole row tilts with it.
| Setting | What it does |
|---|---|
| Bars / Bar spacing | How many blocks there are and how much air is left between them, as in the flat Bars. |
| Depth | How far back the blocks extend. At the minimum they are almost flat; raising it gives the row a corridor-like appearance. |
| Camera angle | Moves the vanishing point sideways, so you look at the row from the left or from the right instead of straight on. |
| Camera height | Moves it up and down, across 85% of the window height. A bar that grows past the horizon loses its top face — exactly what happens when something rises above eye level. |
| Floor grid | Draws a grid receding under the bars. The grid lines use true perspective spacing, bunching up and fading out with distance. |
| Vertical gradient | Shades the front and side faces, with both gradients meeting along their shared edge. |
Out of the box: 64 bars, bar spacing 5, depth at the minimum, camera centered and at its highest position, no floor grid and no vertical gradient. A flat, clean starting point — turn up the depth and drop the camera to see what the perspective can do.
The four reactions of the Text visualization
Besides the word and the font, Text lets you choose how the letters respond to the sound:
| Reaction | What it does |
|---|---|
| Letter by band | Each letter follows a different frequency range, so the word ripples from left to right. |
| Global beat | The whole word grows on every strong beat, then settles back. |
| Bounce | The word jumps upward with each beat, without changing size. |
| Shake | The letters vibrate on each impact and immediately settle down. |
If the text field is cleared completely, it automatically returns to SoundMotion. Intensity controls how strong the effect looks, whichever reaction you choose.
Color palettes
The palette sets the colors of every visualization — it changes how they look, never how they move. Switch with ↑ ↓, from the right-click menu, or from the Visualization tab.
| Palette | Character |
|---|---|
| Rainbow | The full spectrum. The default: bright, varied, works with anything. |
| Fire | Intense reds and oranges. Hot and energetic. |
| Ice | Clean, cold blues. Calm and modern. |
| Neon | Magenta and turquoise, straight out of a cyberpunk street sign. |
| Mono | Greys with a hint of blue. The most discreet one, made for work desktops. |
| Sunset | Warm reds, pinks and gold. |
| Aqua | Fresh turquoise and water greens. |
| Forest | Natural greens, relaxed. |
| Pastel | Soft, low-saturation colors that blend into the desktop. |
| Vaporwave | Eighties-retro magenta and cyan. |
| Lava | Dark reds that flare into orange as the sound gets louder. |
| Ocean | Deep blues drifting into turquoise. |
| Candy | Playful pinks and light blues. |
| Matrix | Green phosphor on black, like an old terminal. |
| Gold | Golden and amber tones, warm and elegant. |
Widget mode
Widget mode places the visualizer on the desktop behind your windows, making it behave like an animated desktop background. Turning it on does three things:
- The visualizer drops behind other windows. Any normal application window will cover it, and it only becomes visible again after minimizing those windows.
- Mouse clicks pass through it. Desktop icons, folders and shortcuts underneath keep working as if it were not there.
- Always on top and Click-through are managed automatically and greyed out in Options. Your previous settings are restored when you turn Widget mode off.
Which mode do I want?
| I want… | Set it up like this |
|---|---|
| To keep it visible while I work | Always on top, opacity around 0.7, small window in a corner. |
| An animated desktop decoration | Widget mode, with a large centered window. |
| Visible, but able to click through it | Always on top + Click-through. |
| A normal application window | Turn off Always on top, Click-through, and Widget mode. It behaves like any other window. |
Troubleshooting
| What you see | What to do |
|---|---|
| The visualization is frozen | Almost always normal: SoundMotion pauses the visualization when there is no audio. Play something and it moves again. |
| Music is playing but it barely reacts | Raise the Sensitivity. If that does not help, check that Audio source points to the device you are actually using. |
| Everything is maxed out | Lower the sensitivity. Loud or heavily compressed music usually looks better at lower values. |
| I cannot drag it or open its menu | Click-through or Widget mode is on. For Widget mode, choose Exit widget mode in the tray menu; for Click-through, turn it off in tray icon → Options… |
| The visualizer has disappeared | It is hidden (tray icon → Show / Hide) or sitting behind your windows in widget mode. Minimize everything to check. |
| The keyboard shortcuts do not respond | Click the visualizer once to give it focus. In Widget mode, regular shortcuts do not work because the window cannot be focused; press Ctrl+Alt+J to bring it back and make it editable. |
| I switched headphones and it stopped | Choose the current device again in Audio source. If it is not listed, use the refresh button in Options. |
| A warning appears when choosing a device | It may be disconnected, or being used exclusively by another application. Choose a different one. |
| I ruined the settings of one visualization | Select it and use Restore this visualization on the Visualization tab. The other visualizations keep their settings. |
| I want to start over | Options → General → Restore defaults. Language, window position and audio device are kept. |
Frequently asked questions
| Question | Answer |
|---|---|
| Do I need a virtual audio cable? | No. SoundMotion captures the Windows audio output directly, with no extra software. |
| Can I use my microphone instead of system audio? | Yes. Right-click the visualizer → Audio source and pick your microphone or line input; input devices are listed with their own icon. The same list is available in Options → General. From then on the visualization follows what the microphone hears instead of what your PC is playing. |
| Does it affect the sound quality? | No. It only captures the audio stream. It never modifies, delays or reroutes your sound. |
| Does it use a lot of resources? | No. CPU and memory usage are minimal: it pauses the visualization when there is no audio, and nothing is drawn at all while hidden. |
| Can I open several visualizers at once? | No. SoundMotion works with a single window. |
| Can I use SoundMotion on multiple monitors? | Yes, on any one of them: drag the visualizer to the monitor you want and it stays there, because its position is remembered between sessions. Since only one window can be open at a time, it cannot be shown on several monitors at once. |
| Does it work with a full-screen game? | It captures the audio correctly, but a full-screen game covers the visualizer. Use windowed mode or a second monitor. |
| Can I recolor just one visualization? | Colors come from the palette, which applies to all of them. The one exception is Radial, whose core color can be set separately. |
| Does it send any of my data? | No personal data or information about your computer is sent. SoundMotion only contacts two files on the author's website: one to check for a newer version, and one for optional announcements. |
| How do I remove it from Windows startup? | Turn off Start with Windows in Options → General. |
Supporting development
If you enjoy using SoundMotion and would like to support its continued development, you can make a donation via PayPal by scanning the QR code below.


Thank you for helping keep SoundMotion improving.